I’m so thankful to feature a few of my favorite bloggers as guest posters while I’m enjoying some time with my family and our new baby girl. I promise to update you all soon with details about her arrival!
Today I’m welcoming Beth from The Beth Next Door, who despite never having met in real life, feels like a true friend to me. Her adorable son Ollie is just a few months younger than Jona, so I love hearing her life updates about him and their family. She also shares her fun, colorful style, local adventures in Minnesota, and posts about home brewing, something that she and her husband love to do (which is so awesome, right?). Thanks so much for being here Beth!
Hi everyone! I’m Beth and I blog over at The Beth Next Door. I’m so happy to be here while Shea is cuddling her new little girl! I have a little boy named Oliver who is just a little bit younger than Shea’s Jona. Now that it’s finally Fall I am super excited to get back into an activity that I loved sharing with Oliver toward the end of last winter – baking! Today I’m going to share one of my favorite cookie recipes with all of you – Cowboy Cookies.

I inherited this recipe from my in-laws after my husband and I were married. They always made these cookies to take on family trips. I decided that once a year is just not enough for these cookies, so we make them whenever the mood strikes. They are crunchy and delicious. They hold up well too, you could still be eating them a week later and they would still taste good, though they are so yummy they rarely last that long for us before they disappear!
Here is the recipe:
2 cups Flour
1 Teaspoon Baking Soda
½ Teaspoon Salt
½ Teaspoon Baking Powder
Sift dry ingredients together
1 Cup butter
1 Cup white sugar
1 Cup brown sugar
Blend together
Add 2 eggs, 1 teaspoon of vanilla and mix all together
Add 2 cups Oatmeal and 1 16 oz package of chocolate chips
Drop by rounded teaspoons on greased cookie sheet
Bake for 15 minutes at 350 degrees.
A few tips I recommend – keep the dough balls small. These spread out like you wouldn’t believe and I don’t know about you, but I like smaller cookies so I can eat more than one and not feel as bad about it! Make sure your ingredients are fresh – we buy pretty good sized containers of things like flour and sugar and while they last a long time, I have noticed cookies turn out better if your flour and sugar are fresher. I have also learned that my oven cooks just a hair uneven, so I will often turn them around after the first 10 minutes and give them an extra five or so.
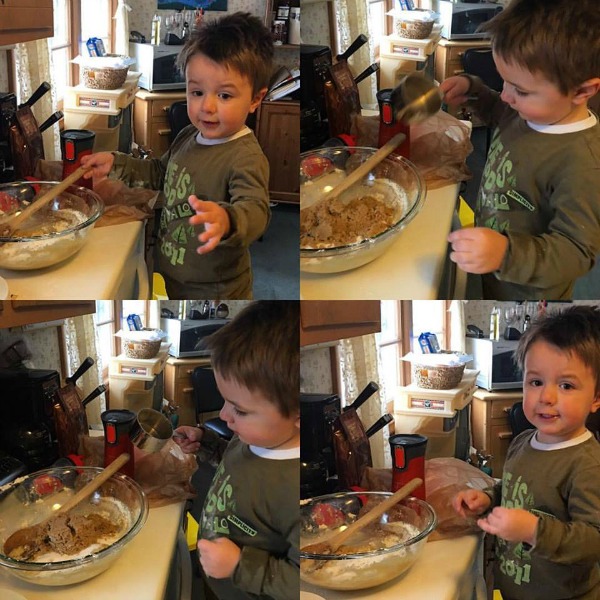
This is a great activity for kids as long as you have a little patience. I let Oliver handle just about all the dry ingredients after I measure them out. Yes he might spill a little, but for the most part he does really well with pouring them into the bowl and he loves it. I do let him “stir” a bit too. And then the best part is pouring a glass of milk and enjoying a cookie (or ten) after they’re all done!
Do you have a favorite cookie recipe? Do you enjoy baking with your kids?
These cookies look so good, I can’t wait to try them myself! I also love getting Jona involved in the kitchen, so I will definitely let him help me make them. Thanks Beth!

